When you're first sitting down at the piano, the long stretch of black and white keys can feel a bit overwhelming. A piano key chart is a simple but powerful tool that lays right on your keyboard, labeling each note so you can instantly find your way around.
Think of it as a roadmap. Instead of guessing where Middle C is, or trying to remember which black key is a sharp or a flat, the chart shows you exactly where everything is. This takes the guesswork out of those first few lessons and helps you build confidence from day one.
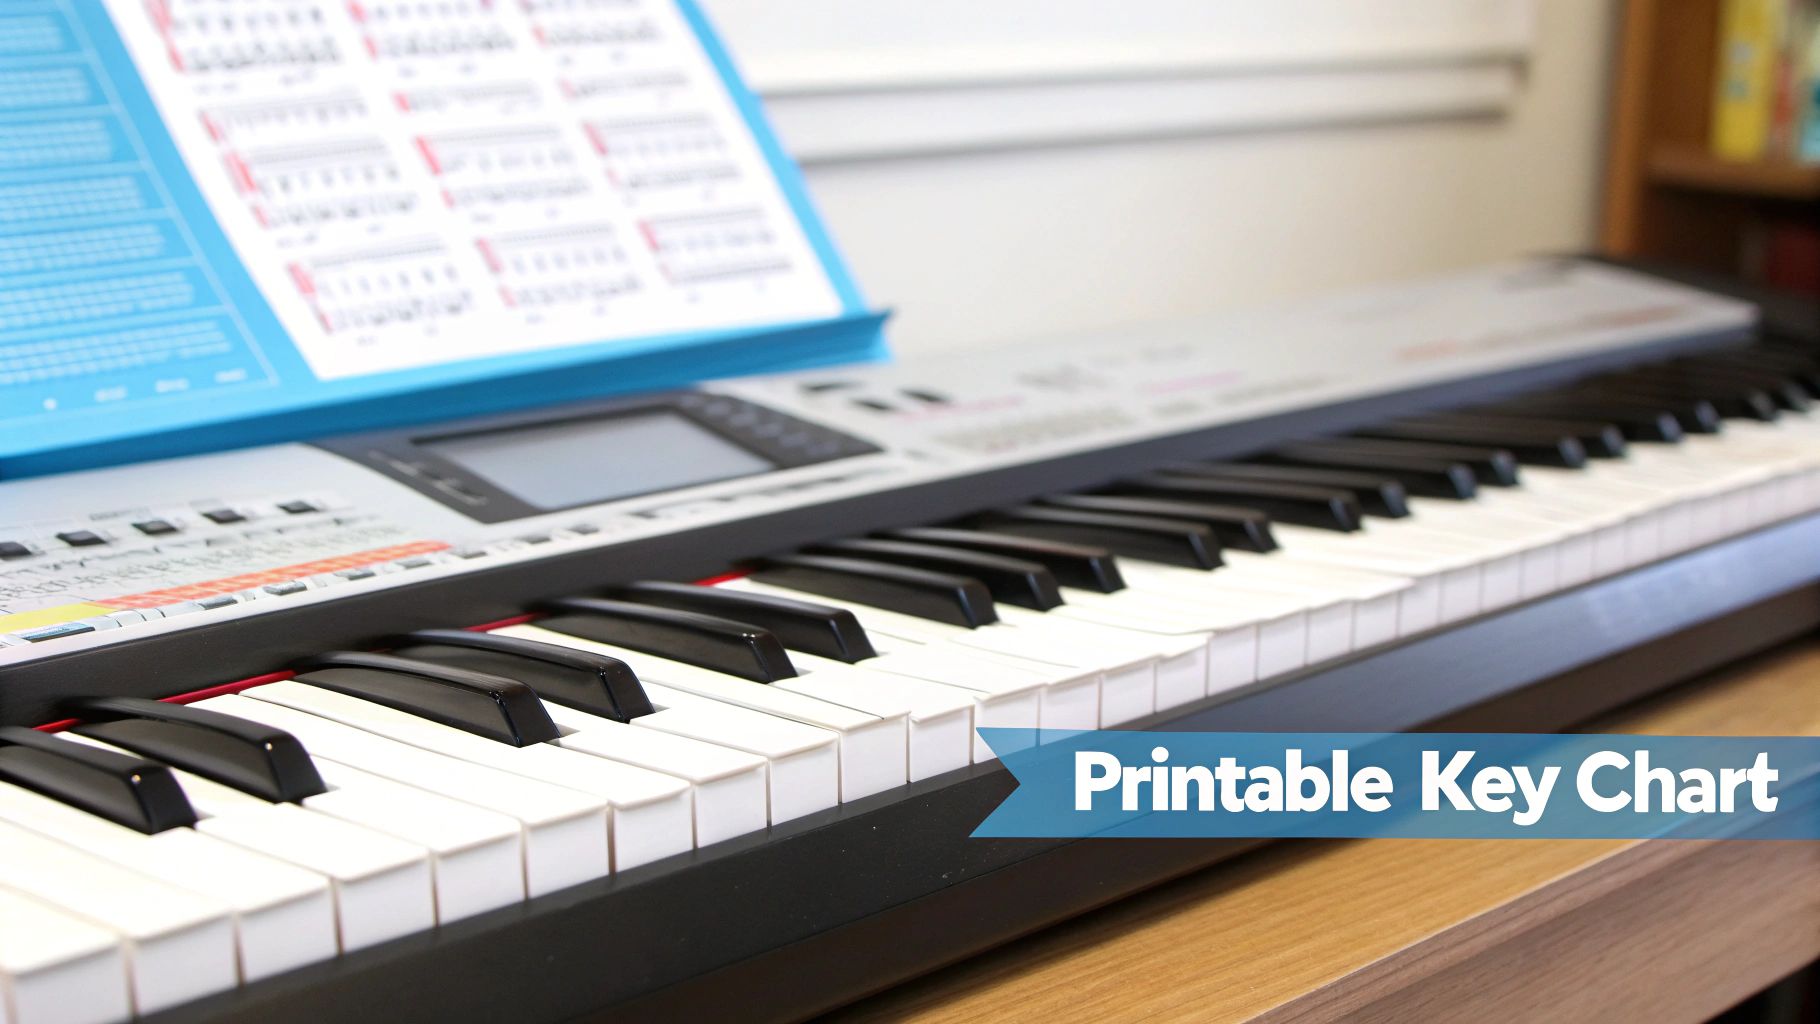
Your Free Printable Piano Key Chart
The first step to playing music is learning the layout of your instrument. A printable chart is one of the best ways to do this, turning that confusing grid of keys into a simple, easy-to-read guide. Having that immediate visual reference is fantastic for building muscle memory and making note recognition second nature.
To help you get started, we've designed a clear, high-quality chart that you can download and print. It’s not just some random diagram; we created it to fit neatly behind the keys, making it a practical, hands-on tool for your practice sessions.
Charts for Every Keyboard Size
We know that pianos and keyboards come in all shapes and sizes. That's why we didn't just make one chart; we made several to ensure you have a perfect fit for whatever instrument you're using.
- 88-Key Chart: This is the one you’ll want for full-sized acoustic pianos and most digital pianos.
- 61-Key Chart: A perfect match for the most common size of portable keyboards.
- 49-Key Chart: Designed to fit smaller MIDI controllers and many beginner keyboards.
This diagram shows how our piano key chart concept adapts to fit the most popular keyboard layouts.
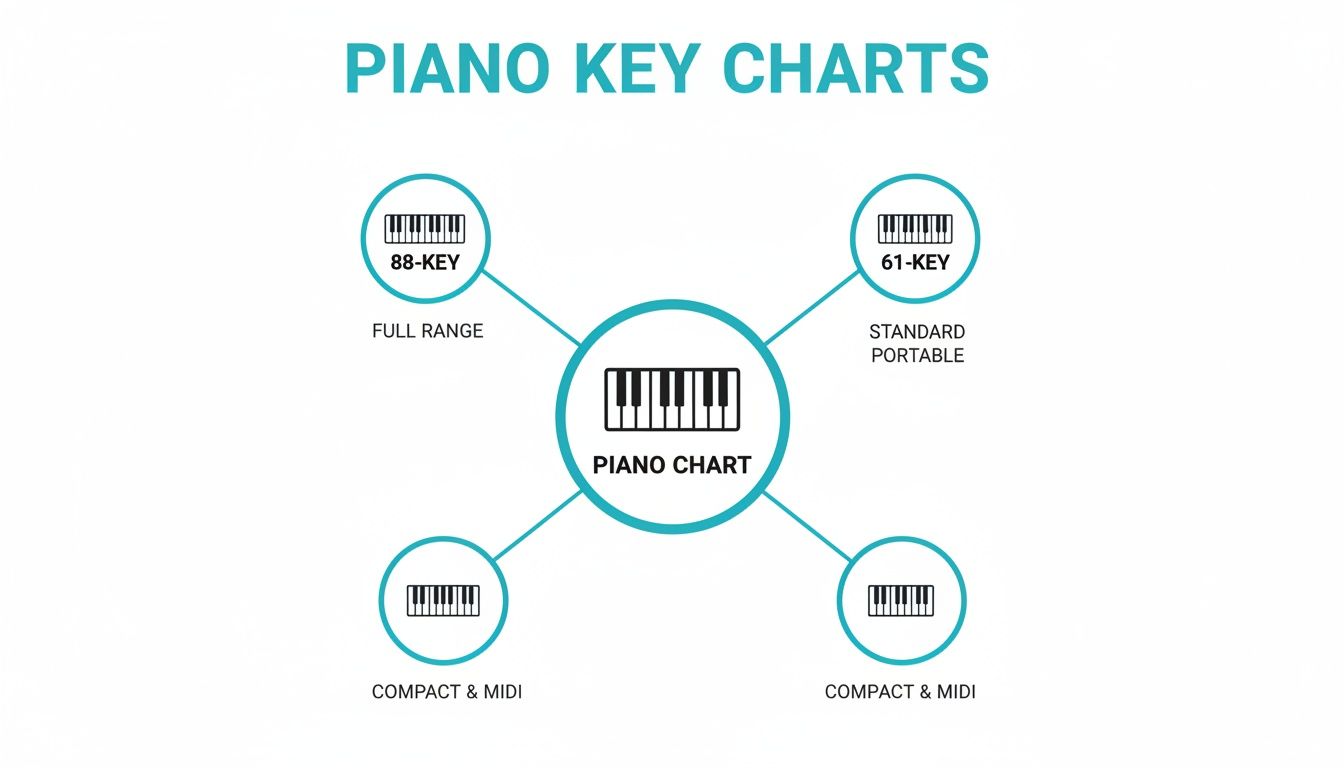
As you can see, the core idea is a versatile tool that works whether you have an 88-key, 61-key, or 49-key instrument. These kinds of visual aids are a staple in modern music education for a reason—they just work.
You’ll see similar tools used in popular methods books, which often include fold-out charts that cover multiple octaves. It really highlights how valuable these references are when you're just starting. For a sturdier, longer-lasting chart, you might want to try printing on cardstock for a more durable, professional feel.
Navigating The Standard 88-Key Piano Keyboard
Sit down at almost any full-sized piano or digital keyboard, and you’re looking at a layout that’s been the worldwide standard for nearly 150 years. That consistency is a massive advantage when you're just starting out. The skills you build on one piano will transfer directly to just about any other you'll ever play.
Think of the keyboard as a visual map of sound, organized logically from the lowest notes on the far left to the highest on the far right. This isn't just a random arrangement; it's a simple, repeating pattern of white and black keys that opens up the entire world of music. Getting a feel for this universal design is your first big win.
The Universal 88-Key Standard
The modern piano keyboard as we know it settled on 88 keys back in the late 1800s, and that configuration has been the gold standard ever since. This layout is made up of 52 white keys and 36 black keys, covering a little over seven full octaves. For our students at East Valley School of Music, this means what you learn here is instantly applicable everywhere. You can dive deeper into piano scales and keyboard layout on Hoffman Academy.
This standard gives you the full expressive range needed to play the overwhelming majority of classical, pop, and jazz music ever composed. Every time you practice on an 88-key instrument, you’re preparing yourself for any musical opportunity that comes your way.
The real beauty of the 88-key standard is the confidence it gives learners. You're not just learning your specific keyboard; you're learning the language of the piano itself, spoken fluently across the globe.
Even if you’re starting on a smaller keyboard, the pattern of notes is exactly the same, just with fewer octaves. Don't have an instrument yet? No problem. Exploring different options is the perfect first step. Take a look at our guide on instrument rentals to find the right fit for your home and practice goals. This foundational knowledge ensures you’ll have a smooth transition as you grow.
Decoding The Musical Alphabet on The Keys
Staring at a full 88-key piano can feel a little intimidating. It looks like there are 88 different notes you have to learn, but I've got good news: it's way simpler than that. The entire keyboard is just one simple pattern of 12 notes, repeated over and over.
Once you get your head around that single pattern, you've cracked the code for the whole instrument.
Finding Your Way Around With Black Key Landmarks
The first thing to notice is how the black keys are laid out. They aren't random; they're set in repeating groups of two and three. These little groups are your signposts, your landmarks for getting around the keyboard. Forget guesswork—this is how you'll always know where you are.
Here’s the trick:
- Look for any group of two black keys. The white key just to the left of that group is always a C.
- Now find a group of three black keys. The white key to its immediate left is always an F.
Once you've found C and F, you can easily figure out the rest of the white keys. Just say your alphabet! The note after C is D, then E, and so on. Music only uses the letters A through G, and then the cycle starts again. Using this simple landmark system, you can name every single white key on the piano.
The Repeating 12-Note Pattern
So, what makes up this magic pattern? It's a combination of seven white keys and five black keys. These 12 notes are the building blocks of all Western music, and they just repeat up and down the piano. If you're curious about the science behind it, you can learn more about the 12-note system and its frequencies.
This repeating set of 12 notes is called an octave. When you go from one C to the very next C, you've traveled up one octave. The pitch gets higher as you move to the right and lower as you move to the left, but the note names stay the same.
The table below breaks down all 12 notes you'll find within a single octave.
The 12 Notes of the Musical Alphabet
This table shows the complete set of notes that repeat across the keyboard. You'll see the natural notes (white keys) and the accidentals (black keys), which have two possible names.
| Note Name | Alternative Name (Enharmonic) | Key Type |
|---|---|---|
| C | N/A | Natural |
| C♯ | D♭ | Accidental |
| D | N/A | Natural |
| D♯ | E♭ | Accidental |
| E | N/A | Natural |
| F | N/A | Natural |
| F♯ | G♭ | Accidental |
| G | N/A | Natural |
| G♯ | A♭ | Accidental |
| A | N/A | Natural |
| A♯ | B♭ | Accidental |
| B | N/A | Natural |
As you can see, the black keys get their names from the white keys next to them. They can be called a sharp (♯) of the note to their left, or a flat (♭) of the note to their right.
Here's the big takeaway for any beginner: You are not learning 88 different things. You are learning one simple, 12-note pattern that just repeats about seven times. Master that one pattern, and you've mastered the layout of the entire keyboard.
How To Find Middle C and Understand Octaves
Every pianist's journey begins with finding one crucial note: Middle C. Think of it as your home base on the keyboard—the central landmark that helps you get your bearings and navigate the rest of the keys. It’s the very first skill any new player needs to lock down.
Finding Middle C is actually pretty easy. Just sit down right in the middle of your piano or keyboard. Now, look for the group of two black keys closest to the center. Middle C is the white key sitting just to the left of that pair.
What Makes Middle C So Important?
Middle C isn't just a random starting point; it's the anchor of the grand staff, which is the set of lines that music is written on. It sits perfectly between the treble clef (where the right hand usually plays) and the bass clef (where the left hand usually plays). This makes it the ideal spot to start learning how to coordinate both hands.
You'll see that your piano key chart for beginners always makes this note stand out. On a full 88-key piano, Middle C is the fourth "C" you'll find if you count up from the very bottom. That little fact leads us straight into another key concept: octaves.
An octave is simply the distance from one note to the next one with the same letter name. For instance, when you move from one C to the next C up the keyboard, you've moved up one octave. The pitch gets higher as you go right and lower as you go left.
Understanding Octave Numbering
To make sense of all those repeating notes, we give them numbers. This system helps you know exactly which C, G, or F you're supposed to play. Middle C is officially known as C4, because it marks the start of the fourth octave on a standard piano.
Here's a quick breakdown:
- C1: The very first C at the low end of the keyboard.
- C2: The C that kicks off the second octave.
- C3: The C just below Middle C.
- C4: Your home base, Middle C.
- C5: The C one full octave above Middle C.
This numbering system is your map. It tells you exactly where a note on the sheet music lives on your keyboard. All the other notes within an octave share that same number—so D4, E4, and F4 are all neighbors of C4. Getting comfortable with this is a foundational skill that will make reading music a whole lot easier down the road.
Understanding Sharps, Flats, and Naturals
The black keys on the piano can seem a little intimidating at first, but they follow a surprisingly simple and logical pattern. We call these keys sharps (♯) and flats (♭), and getting to know them is what unlocks your ability to play in any musical key.
Think of sharps and flats as simple directions. A sharp tells you to go up, and a flat tells you to go down. The smallest possible move you can make on the piano is called a half step. Playing a white key and then the black key right next to it is a perfect example of moving one half step.
What Are Sharps and Flats?
When you see a sharp symbol (♯) next to a note, it’s an instruction to play the key that's one half step higher than the original note. For example, if you see an F-sharp (F♯), you simply play the black key immediately to the right of the white F key.
A flat symbol (♭) does the exact opposite; it tells you to play the note one half step lower. So, G-flat (G♭) is the black key sitting just to the left of the white G key. Here's the interesting part: F♯ and G♭ are the exact same physical key! This is called an enharmonic equivalent—it’s just one key, but it has two different names depending on the musical situation.
Don't get bogged down by the idea of enharmonic equivalents. You aren't learning five brand-new notes when you tackle the black keys. You're just learning two different ways to name them based on their relationship to the white keys on either side. It actually simplifies the keyboard once it clicks.
The Role of the Natural Sign
So, what if a song has an F♯, but a few notes later, the composer wants you to go back to playing a regular F? That’s what the natural sign (♮) is for. A natural sign is a musical "reset button"—it cancels out any previous sharp or flat and tells you to play the original white key version of the note for the rest of the measure.
To make this easier, here’s a quick lookup table. You can use it with your piano key chart for beginners to identify the five black keys and their two different names within any octave.
Quick Reference for Sharps and Flats
| Black Key Position | Sharp Name (♯) | Flat Name (♭) |
|---|---|---|
| Right of C | C♯ | D♭ |
| Right of D | D♯ | E♭ |
| Right of F | F♯ | G♭ |
| Right of G | G♯ | A♭ |
| Right of A | A♯ | B♭ |
This simple system of sharps, flats, and naturals is really all you need to find your way around the entire keyboard. Once you get the hang of it, you’ll be able to read and play music with much more confidence.
Your First Exercises Using The Piano Key Chart
Alright, you’ve got your chart set up on the piano. Now for the fun part: making some actual music! The goal here isn't to play anything complicated. It’s all about making a connection—linking the notes you see on the chart to the feeling of your fingers on the keys. We’ll start with a couple of simple exercises that are designed to feel rewarding and build your confidence right from the get-go.
Think of these first steps as a way to get your hands and your brain talking to each other. Research into motor learning has shown time and again that breaking a new skill into tiny, repeatable steps is the quickest way to build muscle memory. That's exactly our plan.
The Five-Finger Scale On C Major
One of the very first things almost every new pianist learns is the C Major five-finger pattern, sometimes called a pentascale. It’s perfect for establishing a solid hand position and just getting your fingers used to moving independently.
- Find Middle C (C4): Use your chart to locate Middle C and place your right-hand thumb (finger 1) on it.
- Position Your Hand: Let the rest of your fingers fall naturally onto the next four white keys. Your pointer finger (2) will be on D, your middle finger (3) on E, your ring finger (4) on F, and your pinky (5) on G.
- Play Ascending: Gently press down each key one at a time, starting with your thumb and moving up to your pinky. As you play each note, say its name out loud: C, D, E, F, G.
- Play Descending: Now, come back down. Start with your pinky on G and work your way back to your thumb on C. Again, say the names: G, F, E, D, C.
Take your time and repeat this a few times. You're aiming for a firm, even touch on each key. Once that feels comfortable, give it a shot with your left hand. This time, you'll place your pinky (finger 5) on C3, which is the C just to the left of Middle C.
Playing Your First Song: Mary Had A Little Lamb
Let's use that same five-finger position to play a real tune. "Mary Had a Little Lamb" is a classic for beginners because it only uses three notes. Keep your right hand right where it was for the C Major scale.
Here are the notes and which finger to use for each syllable:
- Ma-ry had a lit-tle lamb: E(3) – D(2) – C(1) – D(2) – E(3) – E(3) – E(3)
- Lit-tle lamb, lit-tle lamb: D(2) – D(2) – D(2) – E(3) – G(5) – G(5)
- Ma-ry had a lit-tle lamb: E(3) – D(2) – C(1) – D(2) – E(3) – E(3) – E(3)
- Its fleece was white as snow: E(3) – D(2) – D(2) – E(3) – D(2) – C(1)
Don't worry about speed. Just focus on the rhythm and getting a smooth flow from one note to the next. Playing a recognizable melody, no matter how simple, is a massive win. It’s proof that you're officially making music.
These first exercises are the bedrock of your piano journey. As you keep practicing, you'll see how these simple patterns are the building blocks for more complex music. When you're ready for more structured guidance, our dedicated piano lessons for beginners are designed to take you from these first few notes all the way to playing your favorite songs.
Got Questions? We’ve Got Answers.
Jumping into the world of piano can bring up a lot of questions, even with a handy chart in front of you. That’s totally normal! We see the same questions pop up all the time with new students. Here are some straightforward answers from our teaching experience to help clear things up.

Think of this as your go-to guide for those first hurdles. Our goal is to get you playing with confidence.
Do I Really Need an 88-Key Piano to Start?
Absolutely not! While a full 88-key piano is the standard for classical repertoire, you can learn a ton on a smaller keyboard. A 61-key or even a 49-key instrument is perfectly fine for getting started.
In fact, these smaller keyboards are often more budget-friendly and don't take up as much space, which makes them a fantastic choice for beginners. You’ll have more than enough notes to play most beginner and intermediate pieces, and our printable charts come in sizes to fit them.
How Long Should I Keep Using a Piano Key Chart?
Think of the chart as a set of training wheels. It’s there to help you build a solid mental map of the keyboard, but the goal is to eventually ride without it. Most beginners find they only need it for the first few weeks or maybe a couple of months.
There’s no strict timeline, so don't rush the process. As you practice, you'll find yourself recognizing the notes without a second thought. Once you feel comfortable finding your way around the keys on your own, you can put the chart away.
What's the Difference Between a Piano and a Keyboard?
The big differences come down to feel and sound. An acoustic piano has weighted keys that trigger little hammers to strike real strings, creating a rich, organic sound. A digital keyboard, on the other hand, creates its sound electronically and usually has lighter, spring-loaded keys.
For anyone just starting out, a good digital keyboard with touch-sensitive keys (meaning it plays louder when you press harder) is an excellent, affordable option. If you're weighing your choices, chatting with experienced piano instructors can help you make the best choice for your specific goals.
Ready to turn that chart into real music? At East Valley School of Music, our instructors are experts at guiding beginners from their very first notes to playing with confidence. Learn more about our personalized piano lessons and start your journey today!